As the temperature drops, a well-functioning heating system becomes essential for a comfortable home. But have you ever wondered how your heating system gets installed? Knowing the heating system installation steps is key to keeping your home warm and cozy.
A guide to heating installation process might seem daunting. But it’s important for homeowners to understand the basics. A correctly installed heating system not only keeps you comfortable but also saves energy, which can save you money.
Key Takeaways
- A well-planned heating installation is vital for comfort and efficiency.
- Understanding the installation process helps homeowners make informed decisions.
- A correctly installed heating system optimizes energy efficiency.
- Proper installation ensures a longer system lifespan.
- Homeowners should consider factors like system type and sizing.
Planning Your Heating Installation
Planning is key to a successful heating installation. It involves several important steps. These steps ensure your new heating system fits your home’s needs and is installed well.
Assessing Your Home’s Heating Needs
Before picking a heating system, you must assess your home’s needs. Look at your home’s size, insulation, window types, and local climate. This helps you find the right heating capacity for your home.
Key factors to consider when assessing your heating needs include:
- The size and layout of your home
- Insulation levels in walls, floors, and ceilings
- Type and quality of windows
- Local climate and average temperatures
Choosing the Right Heating System Type
After assessing your needs, choose the right heating system. You can pick from gas, electric, oil, or renewable energy like heat pumps. Each has its benefits and fits different needs and situations. For example, gas heating is often efficient and cost-effective, while heat pumps save energy and are eco-friendly.
“The right heating system can significantly reduce your energy bills and environmental impact. It’s vital to pick a system that matches your specific needs and local energy prices.” –
Energy Efficiency Expert
Professional vs. DIY Installation Considerations
After choosing your system, decide if you’ll install it yourself or hire a pro. DIY is good for small changes, but complex installations need a pro. They ensure safety, efficiency, and follow local rules.
Consider the following when deciding between professional and DIY installation:
- Your level of experience with HVAC systems
- The complexity of the installation
- Local building codes and regulations
- Safety considerations
By planning well, you can get a heating system that’s warm, comfortable, and energy-efficient. This will last for many years.
Pre-Installation Preparations
A successful heating installation starts long before the work begins. Thorough pre-installation preparations are essential. “Proper preparation prevents poor performance,” a saying true in the heating industry. Knowing the steps for pre-installation can greatly improve the installation’s efficiency and success.
Obtaining Necessary Permits and Understanding Regulations
Before starting, getting the right permits and knowing local rules is key. Not following these can lead to fines and delays. Check your local government website for permit and regulation info. Your installer can also help with these steps.
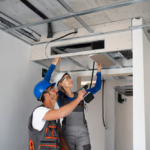
Preparing Your Home for Installation Day
Clear the area around the old or new heating system. Remove obstructions, protect floors, and ensure utility access. This makes the installation smoother and protects your home.
Creating a Detailed Installation Timeline
Work with your installer to plan a detailed timeline. Include start and end dates and key milestones. A good timeline manages expectations and keeps the installation on schedule. It’s also a chance to plan for any unexpected issues.
By focusing on these steps, you’re ready for a successful heating installation. It will meet your needs, be on time, and stay within budget. As
“The way to get started is to quit talking and begin doing.” – Walt Disney
, starting these preparations is the first step to a warmer, more comfortable home.
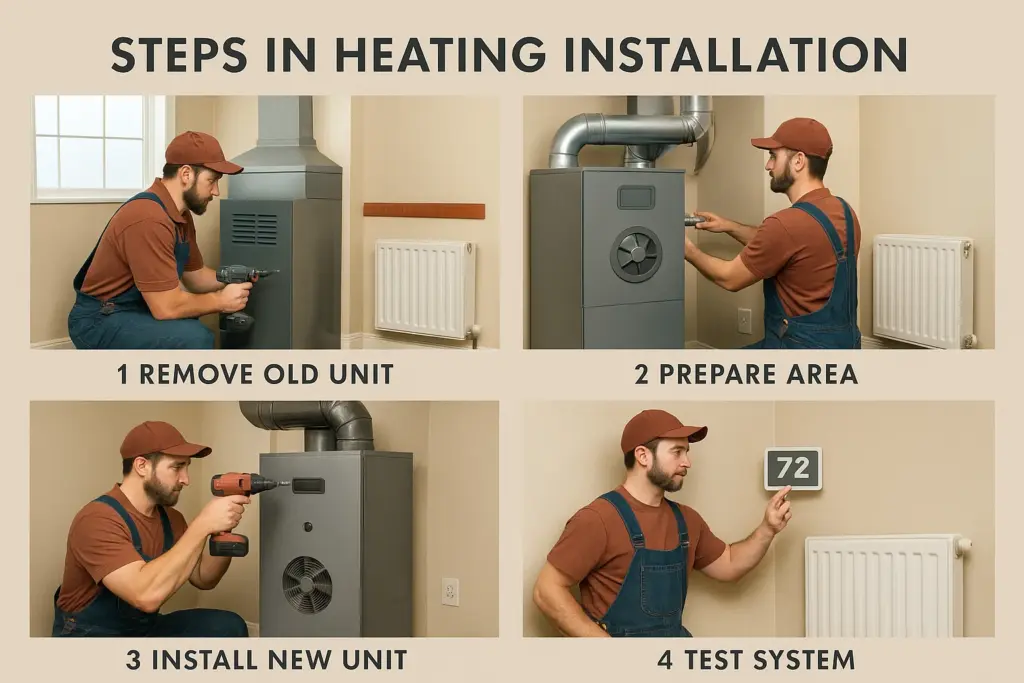
What Are the Steps in Heating Installation? The Complete Process
The heating installation process has several key steps. These steps ensure your new system works well and safely. Knowing these steps helps you get ready for the installation and makes it go smoothly.
Removal of Existing System (If Applicable)
If you’re replacing an old heating system, the first step is to remove the existing unit. This means disconnecting electrical and fuel connections and taking down any ductwork or venting systems. It’s important to do this carefully to avoid damage or safety risks.
Professional installers will take care of removing the old system. They make sure it’s done safely and efficiently. They also dispose of the old system responsibly, following local rules.
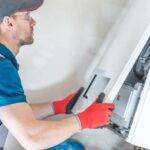
Positioning and Securing the New Heating Unit
After removing the old system, the next step is to put the new heating unit in place. This involves carefully choosing the installation location for best performance and easy maintenance. The unit must be securely fastened to prevent vibrations and ensure safe operation.
Installers also make sure the new unit is properly leveled and aligned. This is key for efficient operation and long life.
Connecting Ductwork, Venting, and Drainage Systems
With the new heating unit in place, the next step is to connect the ductwork, venting, and drainage systems. This requires precise measurements and fitting to ensure all connections are secure and leak-free. Proper ductwork is essential for efficient heating, while venting and drainage systems must prevent safety hazards.
Professional installers check that all connections are secure and meet local building codes. This ensures a safe and efficient heating system.
Electrical and Fuel Connection Procedures
Getting your heating system installed right depends on electrical and fuel connections. It’s key to set these up correctly for safe and efficient heating.
Setting Up Electrical Wiring and Components
When you’re setting up electrical parts for your heating, follow the maker’s guide and local codes. This means linking the thermostat, heating parts, and control systems to power. Make sure all connections are tight and safe to avoid electrical risks.
For those doing it themselves, here are some steps:
- Turn off the power to the circuit you’ll be working on.
- Use the right wiring and connectors for your heating system.
- Label wires and connections for easy maintenance.
Establishing Proper Fuel Line Connections
Setting up fuel lines right is key for safe heating system use, like gas or oil units. Check the fuel lines for damage or leaks before connecting. Use the right fittings and tighten connections as the maker says.
| Fuel Type | Connection Type | Safety Precautions |
| Natural Gas | Flare or Compression Fittings | Check for leaks with soapy water |
| Propane | Flare Fittings | Ensure proper ventilation |
| Fuel Oil | Flare or Compression Fittings | Use a fuel oil leak detection system |
Installing Smart Thermostats and Control Systems
Smart thermostats and control systems make your heating better and easier. They let you control the temperature from afar and adjust heating based on your schedule. Follow the maker’s guide for wiring and setting up the smart thermostat, and make sure it fits your heating system.
For professional help or DIY tips, it’s wise to talk to a pro. They can make sure everything is installed and set up right.
Testing and Quality Assurance Measures
To make sure your heating system is comfortable, safe, and efficient, a thorough testing process is key. This step is vital to ensure all parts of the system work well together.
Initial System Testing and Calibration
The first test checks how the system performs under different conditions. It makes sure it meets the maker’s standards and your needs. This includes setting the thermostat right, looking for ductwork leaks, and making sure the heat is even.
Key aspects of initial system testing include:
- Verifying the system’s heating capacity
- Checking for proper airflow and temperature distribution
- Ensuring the thermostat accurately controls the system
Professional Safety Checks and Inspections
Your heating system’s safety is top priority. Experts do safety checks to find any dangers, like gas leaks or electrical problems. These checks help avoid accidents and follow local safety rules.
Some critical safety checks include:
- Inspecting the venting system for proper installation and function
- Checking electrical connections for safety and integrity
- Verifying that the system is properly grounded
Efficiency Verification and Performance Optimization
After checking for safety and basic function, the next step is to check efficiency and performance. This means looking at fuel use, measuring output, and comparing it to expected values.
| Performance Metric | Expected Value | Actual Value |
| Fuel Consumption | X units/hour | Y units/hour |
| Heating Output | A BTU | B BTU |
| Efficiency Rating | C% | D% |
By using a detailed heating installation checklist and following best practices for heating system installation, you can make sure your system works at its best. This means comfort, safety, and saving energy.
Conclusion: Maximizing Your New Heating System’s Performance
To get the most out of your new heating system, follow the installation process carefully. A well-planned installation ensures your system works efficiently and effectively.
Proper installation is just the start. Regular maintenance is key to keeping your home comfortable and efficient. Schedule annual inspections to check your system’s performance and make any needed adjustments.
By following this guide, you’ve started on the path to a warm and cozy home. Consider smart thermostats and control systems to boost your system’s performance. These technologies help you save energy and money.
Remember to follow the manufacturer’s maintenance and operation instructions. With proper care, your heating system will serve you well for years. It will keep your home warm and comfortable all year round.
FAQ
What are the key steps in a heating installation process?
First, assess your home’s heating needs. Then, pick the right heating system. Next, get the necessary permits.Remove the old system if needed. Position and secure the new unit. Connect the ductwork and venting systems.Lastly, test the system to ensure it works well.
How do I choose the right heating system for my home?
Consider your home’s size, insulation, and climate. Also, think about your budget. Look into different heating systems like forced air or hydronic.It’s wise to talk to a professional to find the best fit for your home.
What are the benefits of hiring a professional for heating installation?
A professional ensures the job is done right and safely. They avoid mistakes and accidents. They also know how to make your system work efficiently.
How long does a typical heating installation take?
Installation time varies. It depends on the job’s complexity, the system type, and your home’s size. On average, it can take a few hours to a few days.
What are the necessary permits and regulations I need to be aware of?
Permits and regulations differ by location. Check with your local authorities for specific requirements. A professional installer will know these rules and guide you.
How can I prepare my home for the installation day?
Clear the area around the installation site. Make sure access is easy. Protect your floors and furniture from dust and debris.Have a plan ready for the installation team.
What is involved in testing and quality assurance after installation?
Testing checks if the system works right and safely. It ensures the system is installed correctly. This step confirms the system will perform well.
How can I maximize the performance of my new heating system?
Keep your system maintained. Change filters regularly and have inspections. Consider a smart thermostat to adjust the system to your schedule.